Homemade Salted Caramel with Vanilla for Holiday Gift Giving

homemade salted caramel bite

I have just moved to Asheville to begin the newest phase of my life as a student of the culinary arts. With the madness of moving back to the country and then moving again shortly after, I’ve been too busy to prepare for the Holidays. This recipe is perfect if you need to produce a special DIY gift on the fly for a bunch of special people.

 winter canopy homemade salted caramel in jars

The exact origins of caramel are unknown, but can generally be traced back to the 17th century. The word itself is from French, meaning ‘burnt sugar’. This came to us via Old Spanish, ultimately from Medieval Latin, traditionally from Latin, possibly from an Arabic origin. Either way, this gorgeous goo has been around for a while. If it has never lived in your fridge, perhaps now is the time.

 winter berries homemade salted caramel in jars 2

I first tried making caramel for molten lava cakes. I had a bit left over which was used to top pumpkin pies for Thanksgiving. These pies were the best pumpkin pies any of us had ever eaten. And since I’d made a lot of pie filling, we were happily having repeat pie every night. This caramel is very versatile and makes everything really, incredibly decedent and delicious.

salted caramel pumpkin pie

Drizzle it on top of your ice cream, stir a dollop in your coffee, spread a little on toast, or eat it with a spoon. Soon, you too, will be as infatuated as I am.

winter berries 2


Homemade Salted Caramel with Vanilla

(yields about six cups!)
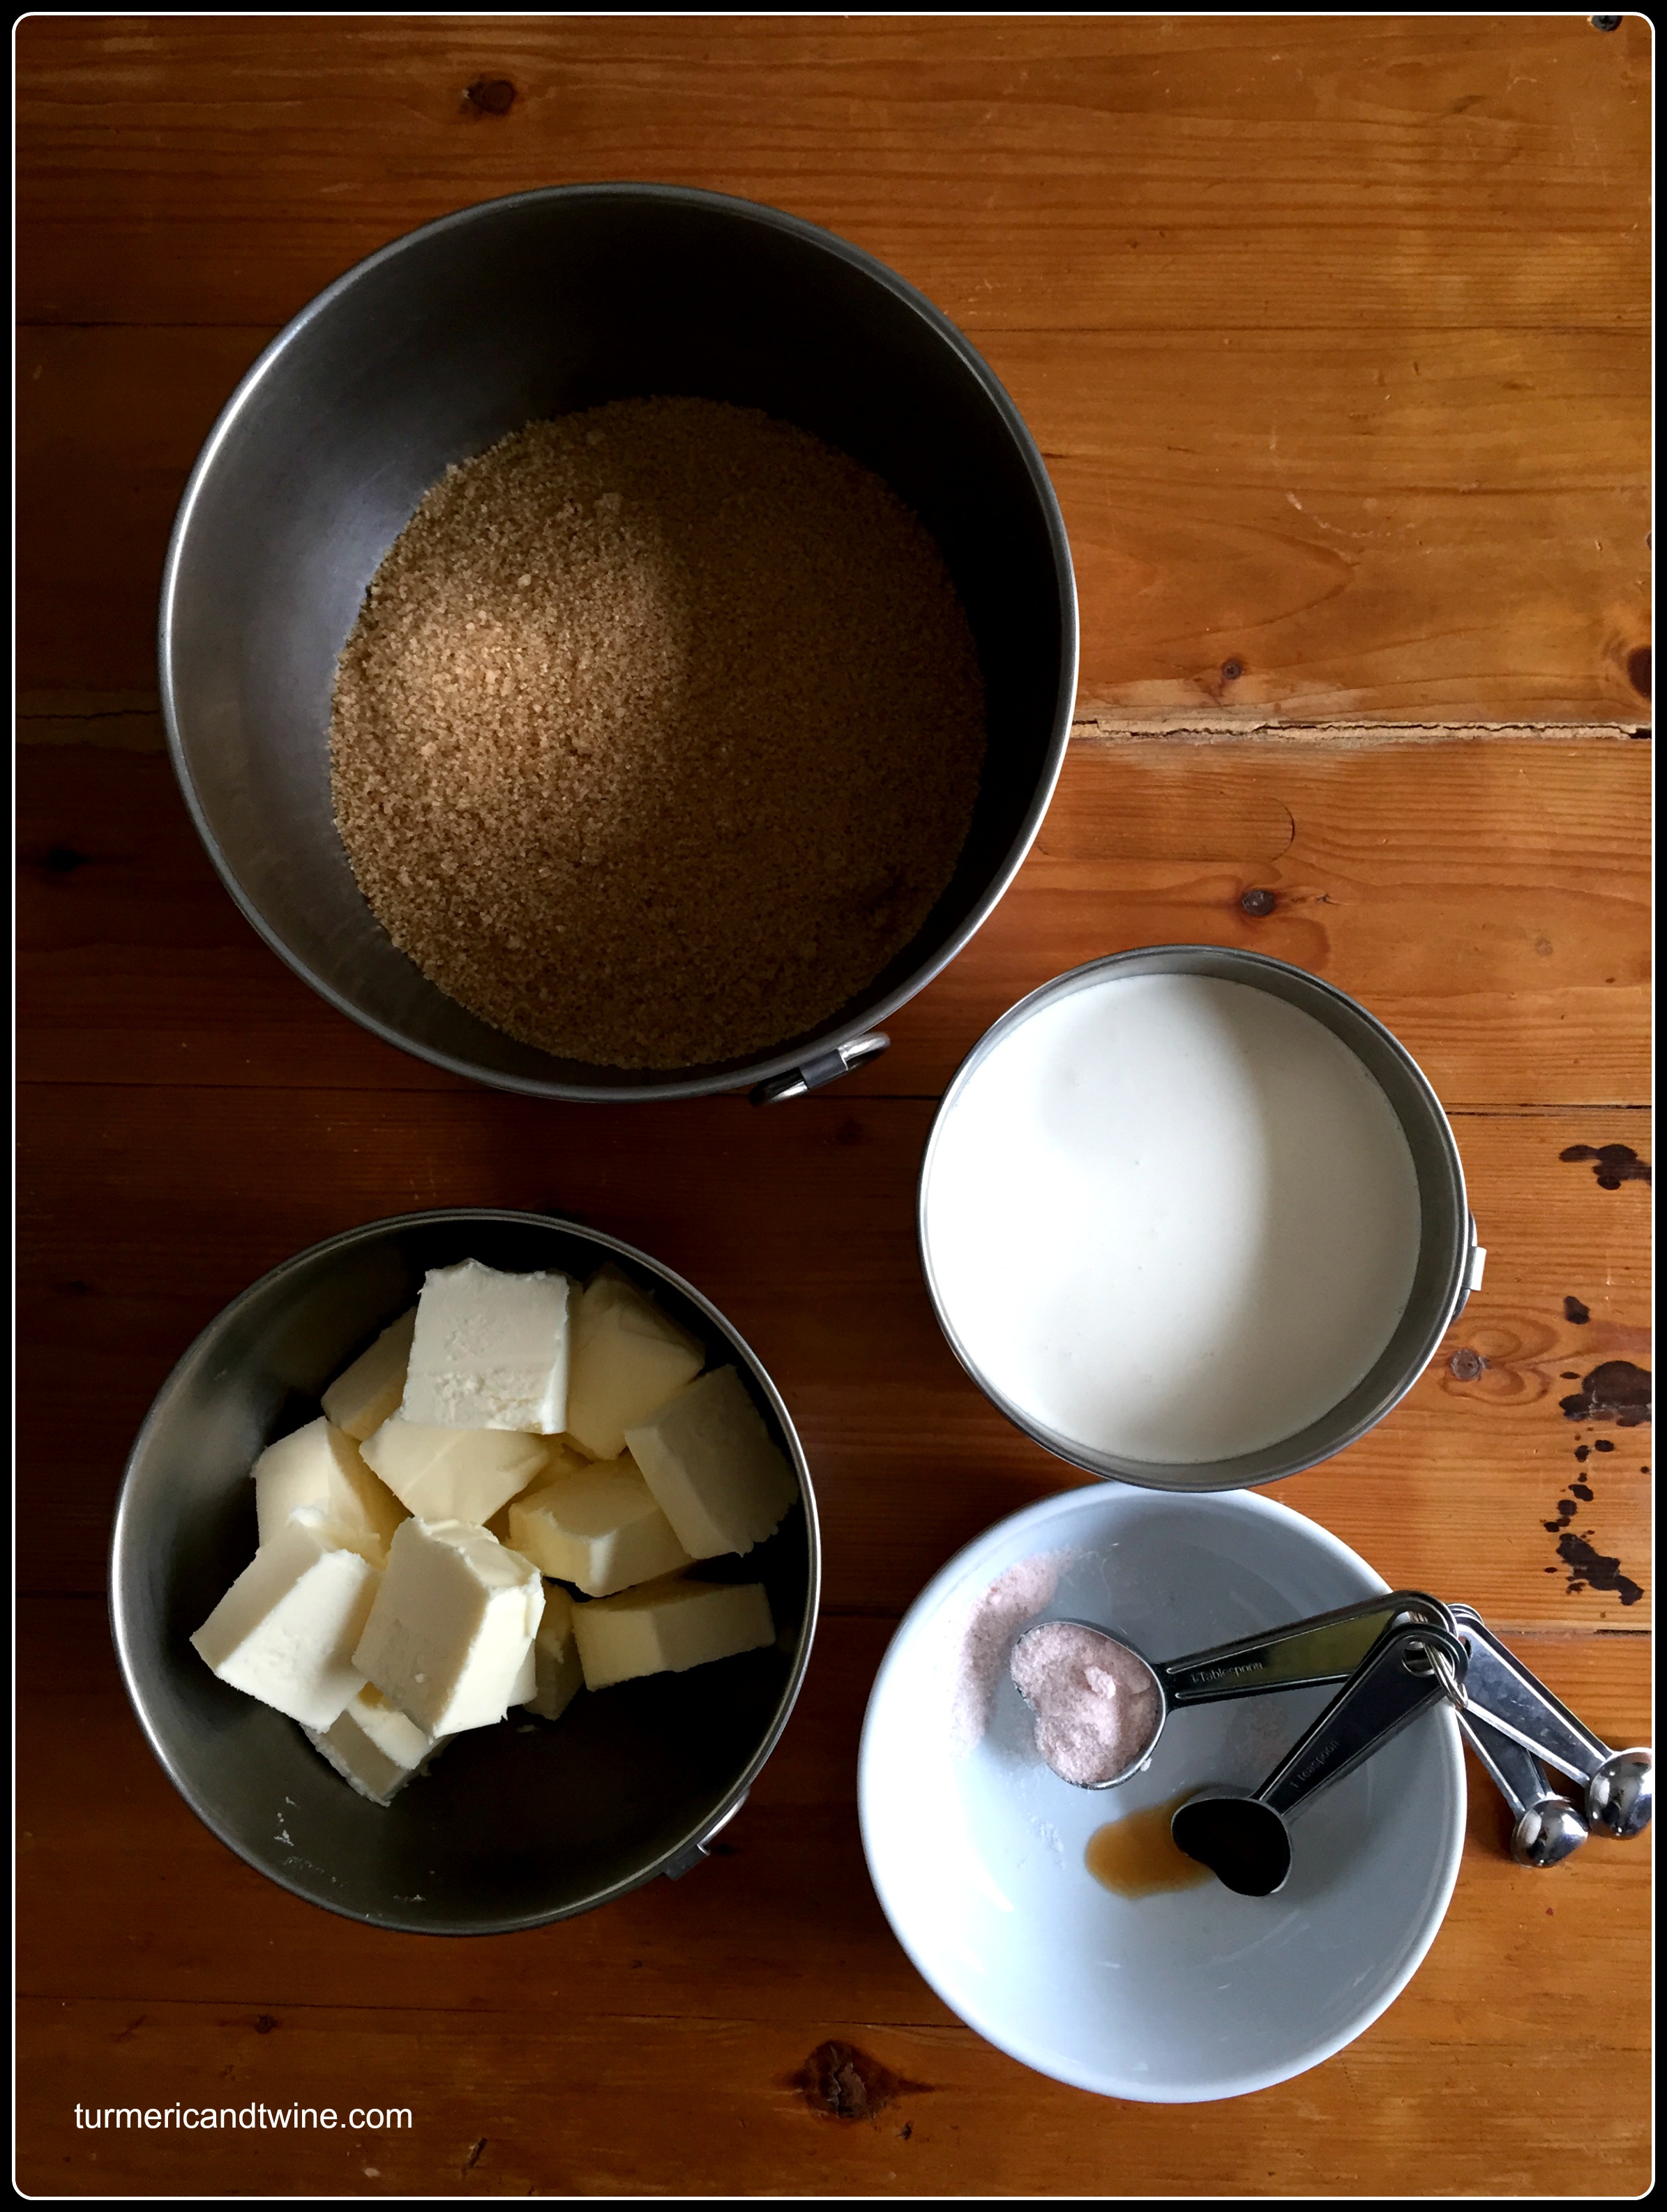
Ingredients

  • 4 cups granulated sugar
  • 2 cups/500 ounces unsalted butter cut into pieces
  • 2 ½ cups heavy cream
  • 1 tablespoon salt
  • 1 teaspoon vanilla extract

salted caramel ingredients

Directions

-Heat sugar in a saucepan over medium heat. Stir continuously with a rubber spatula to avoid burning. The granules will clumps and eventually melt.

-Once the sugar is liquefied, add all of the butter and stir rapidly until the pieces have melted completely. The sugar will not combine with the butter, but stirring will ensure a smooth end product.

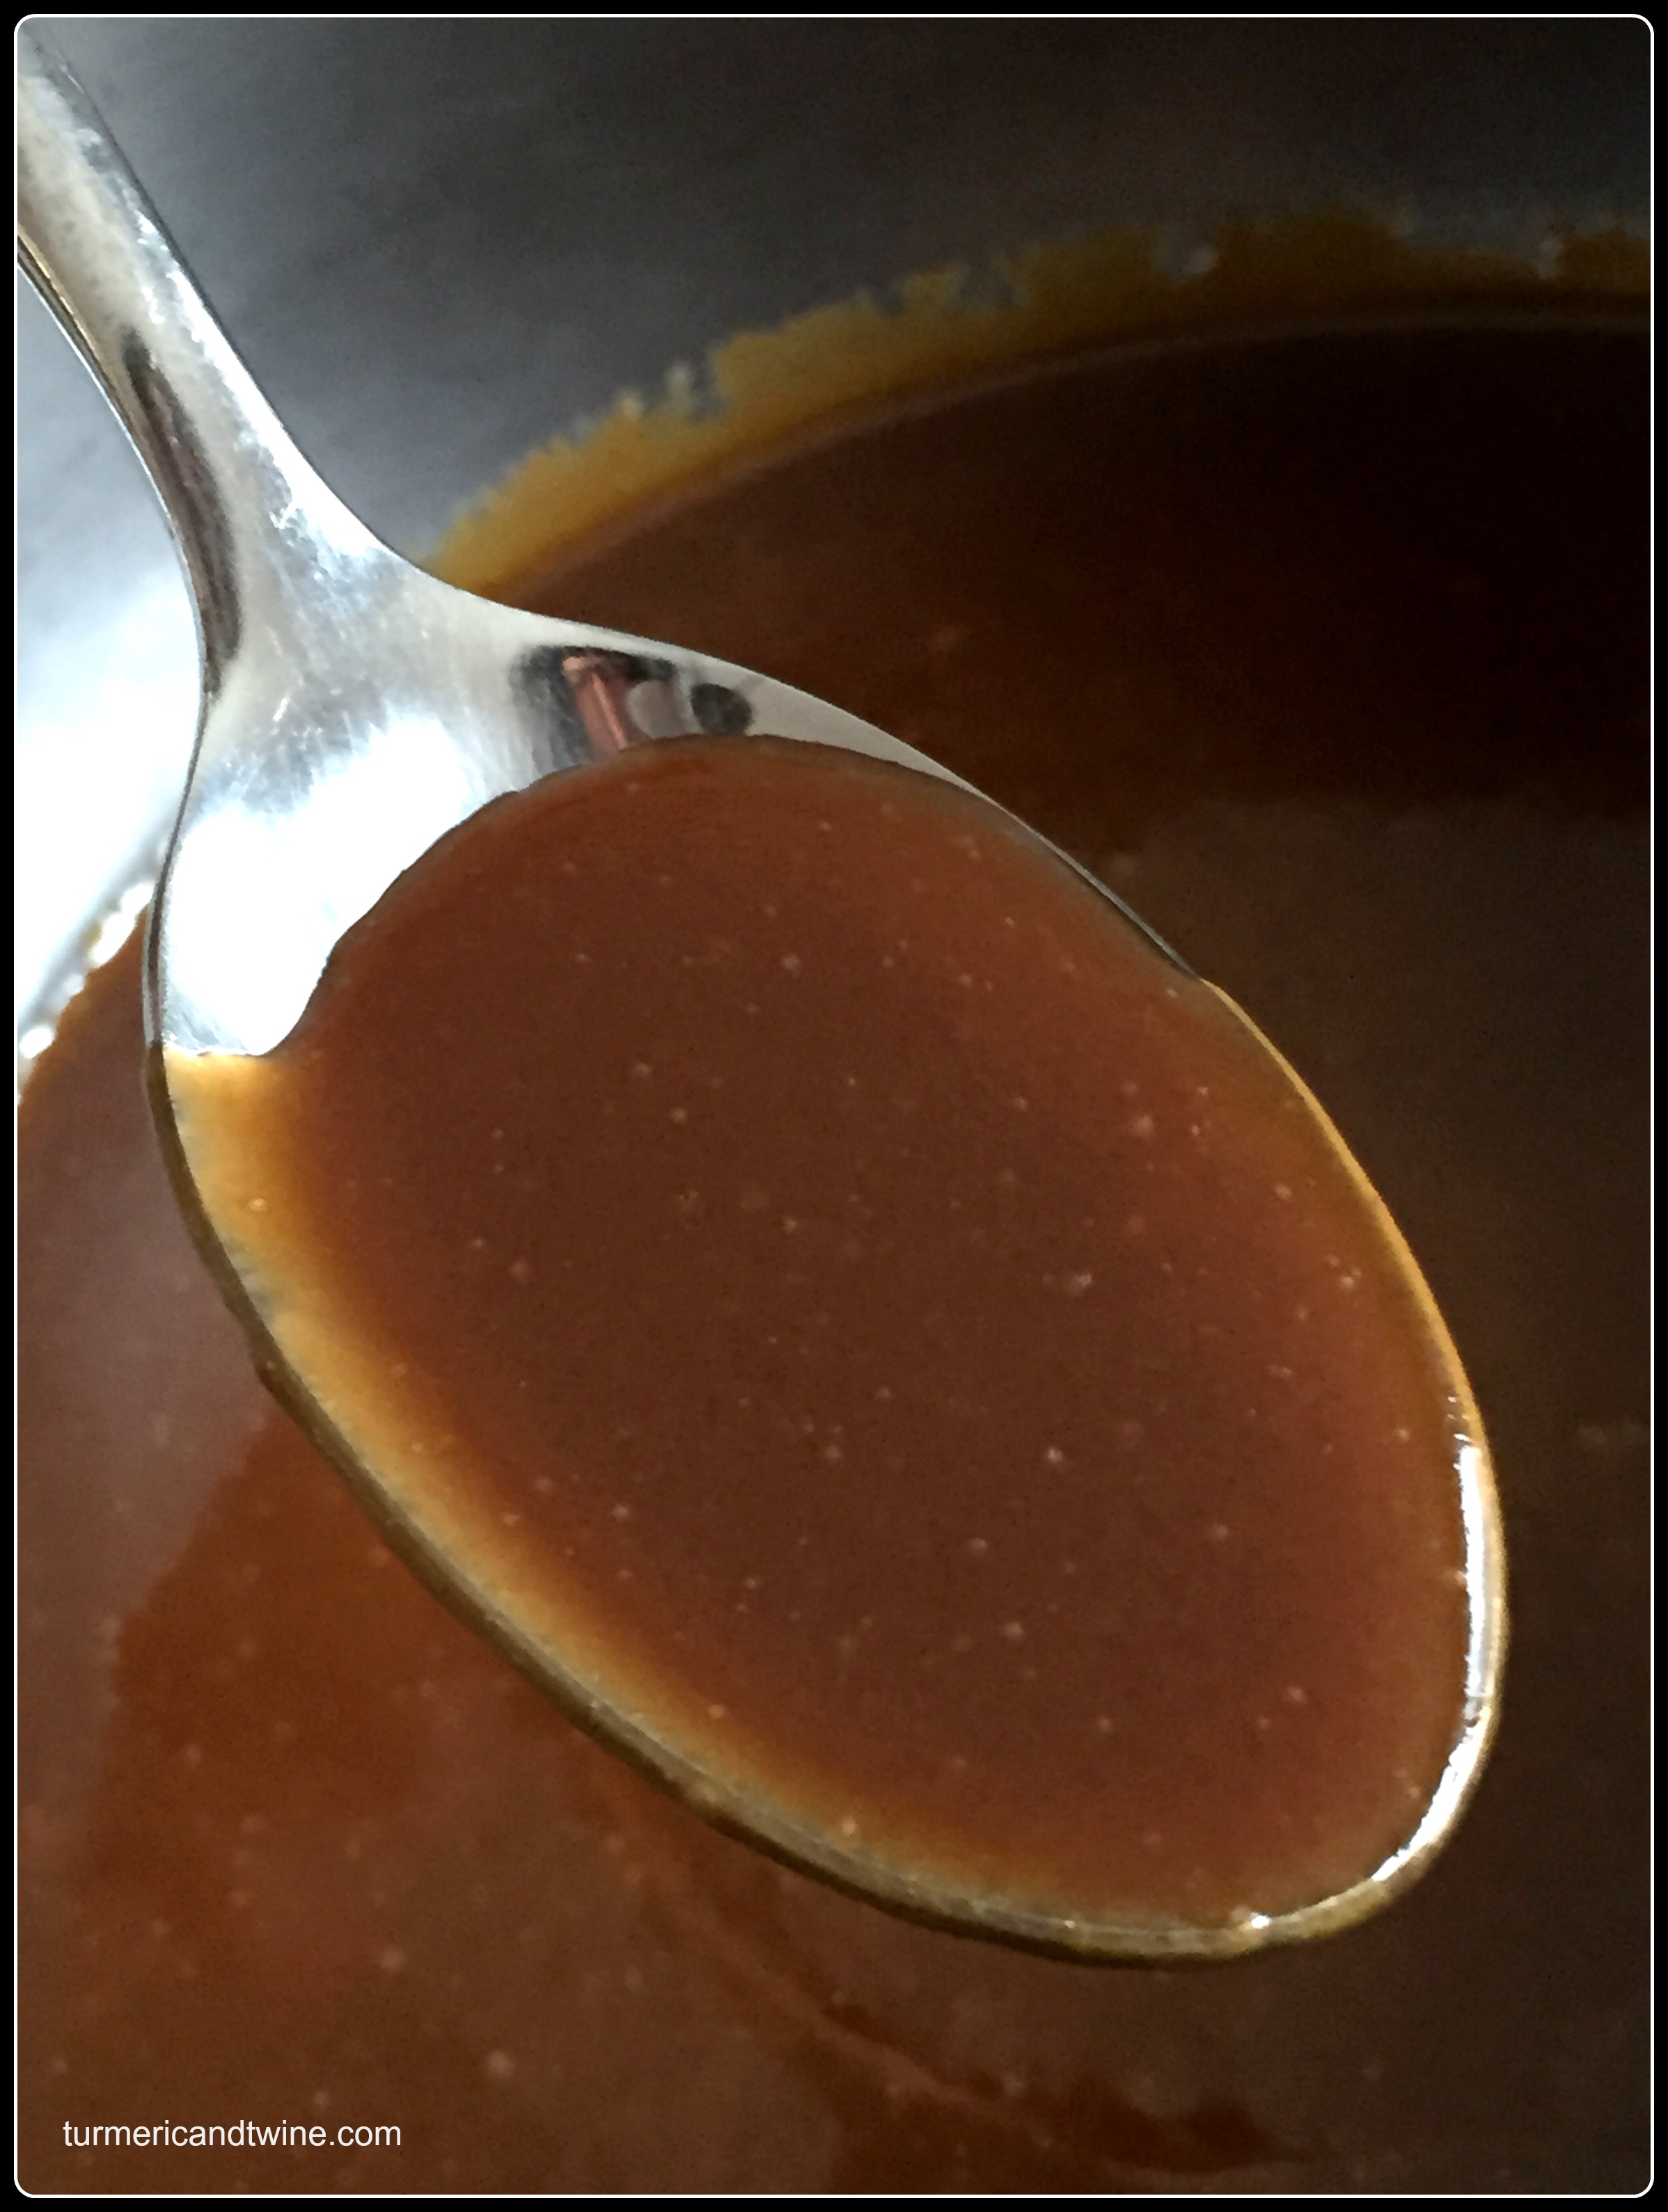
-Using a whisk to stir, slowly pour the cream into the mixture. Due to the coldness of the cream, the hot mixture will splatter as the cream is poured in. Continue pouring and rapidly whisking the mixture until the cream is fully incorporated and the caramel is smooth.

-Stir in salt and vanilla and let the caramel boil for one minute. Remove from heat.

-Let the caramel cool before distributing into gift containers. Small mason jars worked very well for me. Discard any chunks of sugar that may have hardened.

-Keep refrigerated for 3-4 weeks.

Share with friends and loved ones. Happy Holidays!

homemade salted caramel

Kohlrabi Cilantro Salsa for 20

 Kohlrabi cilantro salsa ingredients

Kohlrabi is a member of the brassica family and is cousin to vegetables such as cabbage, brussel sprouts and broccoli. Brassica vegetables are so real, you can’t even handle it. They are known for their sulfurous smells and super green taste. Some poor souls are actually turned off by this.

sliced kohlrabi

What haters might not know is just how versatile the family is. They pickle and ferment like bosses, they can be eaten raw in salads or just as is and they’re loaded with good-for-you fibers and minerals. They also rock any stews and stir fries you might want to try.

kohlrabi cilantro salsa mix

Even though kohlrabi looks a bit like the UFO of the vegetable kingdom on the outside, it actually has a very pleasant and sweet taste. If a sweet broccoli ever existed in prehistoric times, it eventually evolved into the kohlrabi.

kohlrabi cilantro salsa

This recipe yields about a gallon of salsa. If you are like me, it will be gone in a few days, but if it is too much for you or your kitchen, use a smaller kohlrabi (or just half) and fewer tomatoes. Adjust measurements for your pleasure. Hang loose.

kohlrabi cilantro salsa1

This is a fairly watery salsa. I do not recommend draining it as much of the flavour lies in the liquid. Dip chips for a snack, top on toast with an egg for brunch or just dig in with a spoon. Serves 15-20 and will keep in your fridge for a week, although it probably won’t last long enough to go bad. Enjoy!


Kohlrabi Cilantro Salsa


Ingredients

  • 1 large kohlrabi (any colour)
  • 3-4 diced medium tomatoes
  • 1 diced large yellow onion
  • 1 deseeded and diced bell pepper
  • 2-3 minced cloves of garlic
  • 1 washed and chopped bunch of fresh cilantro (including stems)
  • 1 can of black olives
  • 1 can of sweet corn
  • 1-5 chilies (depending on your tolerance… I like it spicy, so I used 5)
  • 1 lemon
  • 1 teaspoon sea salt
  • ½ teaspoon cracked black pepper
  • 3 tablespoons olive oil
  • 1 teaspoon worstershire sauce
  • 1 teaspoon black sesame seeds (for garnish)

Directions

Peel all the skin off the kohlrabi, including the fibrous inner layer, until only the white inside remains. Slice into thin, 5 milimeter slices. Cut the slices into thin sticks and then dice into small pieces.

Place the kohlrabi into a large mixing bowl.

Open the can of olives and drain most of the water (I added a little into my salsa for flavour). Smash olives with the flat side of knife and chop into rough pieces or you could just crush the whole olives in your hands. Add to the kohlrabi. Drain the can of corn and add to the mix.

Add all of the remaining ingredients and mix well. Garnish with cilantro leaves and sesame seeds.


Smoked Duck Szechuan Pepper Stuffed Pumpkin + Rendered Duck Fat

 smoked duck stuffed pumpkin 2

I first started getting the craving to stuff a gourd when the fall harvest hit the markets here in Seoul. The orange pumpkins are a bit different from the ones I’m used to in Canada. They are also harder to find, expensive and too massive for my little kitchen. I settled for a delightful kabocha squash (dan hobak) that can be found everywhere at this time of year. They can be found in a variety of sizes, too, from tiny to medium large. This excites me to no end. I’d love to have a dinner party and serve a tiny pumpkin to each guest (heehee!).

 smoked duck stuffed pumpkin bite

Smoked duck is readily available here in Korea, so as one of my favourite meats, I chose to stuff my gourd with it. It adds an excellent smoky quality and flavour to the mixture, as well. I removed most of the skin and fat before adding the meat to the mixture in order to render it. Duck fat has a gorgeous flavour that is highly complimentary to many food items. I’ve tried to substitute it with pork fat when cooking shiitake mushrooms, for example, and found myself disappointed with the results. Rendering is incredibly easy. Simply collect the fat, cook in a pot on low heat until the fat is clear and strain into a jar for refrigeration. Once cooled, it should be pure and white. The fat should keep for 2-3 months. Use in place of oil or to add flavour.

 smoked duck stuffed pumpkin 1

The Szechuan pepper is a curious spice. Despite its name, it is not closely related to, nor has much of the hot spicy quality found in the Piperaceae family (such as black pepper). In fact, its genus belongs in the citrus family. It has a sharp, bright flavour, which is known to enliven food. It is also known for its numbing feature. Moments after putting one of these husks in my mouth, I was hit with an odd numbness I’ve never quite experienced before. These peppers are perfect for this dish because of how well they bring out all the flavours.

smoked duck stuffed pumpkin bite 2

Smoked Duck Szechuan Pepper Stuffed Pumpkin  

Ingredients

  • 1 medium or 2 small pumpkins (or your favourite round gourds)
  • 150 grams of chopped oyster mushrooms
  • 100 grams of smoked duck cut into bite size pieces (remove fat if rendering)
  • 1 diced bell pepper (any colour)
  • ½ cup cottage cheese
  • ¼ cup milk (any kind)
  • 45 grams or 1/3 cup of cashew pieces
  • 165 grams or 1 cup of uncooked rice (I used brown jasmine, but basmati would substitute well)
  • 5-6 cloves of chopped garlic
  • 1-3 chopped chilies (depending on your spice tolerance)
  • 1 teaspoon capers
  • 1 teaspoon butter
  • ½ teaspoon salt
  • ¼ teaspoon Szechuan peppers

Directions

Rinse rice two or three times by splashing around in water and draining. Finally, add two cups of water and place over high heat in a pot or rice cooker. Once it starts to boil over, turn heat very low for 20-30 minutes. My little test to check if the rice is done without stirring is to tip the pot slightly. If the rice slides or moves in any way, it needs to cook longer. If the rice doesn’t move, it’s done.

While rice is cooking, fill a large pot with enough water to submerge your pumpkin(s) and bring to a boil. Cut the top off the gourd(s) and remove the seeds and gunk.

Once water is boiling, carefully lower into the water, including the top. Allow it to boil for 15 minutes. It should be soft, but firm enough to hold its shape. Drain water and carefully scoop out the gourd. Place in the refrigerator to cool.

Heat a dash of cooking oil in a frying pan and brown the garlic and chilies. Add the mushrooms and fry until the mushrooms have released their water and have reached a modest golden colour.

Preheat oven to 350ºF/180ºC/ gas mark 4.

In a large bowl, mix all ingredients except pumpkin, butter and milk. Mix.

Pour excess water that might have pooled in the pumpkin and begin stuffing with the mixture. Once filled, pour in the milk to fight possible drying out. Top with butter and replace the pumpkin top.

Bake for 25-30 minutes. While it is baking, clean your messy kitchen and think about how hard you will eat your stuffed pumpkin.

Because you boiled the pumpkin, you can eat all of it, including the skin. Do this very thing.

Enjoy your mouth-gasms.

smoked duck stuffed pumpkin

Flavour Pairing: Tangy Dill Walnut Beet Salad + Colourful Things in California

beet salad bite

In the past month, in the midst of my job search, I went on a few mini trips for the purpose of pleasure and to visit friends and family (previously mentioned here). It had been many years since I’d seen my sister and even longer since I’d been on the State side of the Pacific, what with the whole living in Asia thing. In fact, the last time I’d been to the west coast was for my sissy’s wedding to her fabulous wife 5 years ago. It was a lovely trip full of fish tacos, kitties and pretty nature.

The Ladies of Hanukah: Bee, sissy, mum and me. Thanks to Erika for the photo!

While wandering, I took a few (hundred) photos of those pretty natural things. Here are some of my favorites:

Green and yellow treesCA treeCA tree detailCA thornsCA mossNorthern CA landscape

4 trees in profile

ColourfulCA moss 2.

Beets are also colourful. And flavourful.

beet salad 

This recipe has converted a few beet haters I know. Beets pair astonishingly well with dill, which has been a traditional gastronomic practice in many European cuisines in various forms. Borscht in Eastern Europe and salads in Italy. With the aid of lemon and Dijon, this salad is an exemplary archetype of freshness. The walnuts add texture and creaminess. Do make. Do eat. Do enjoy.

beet salad 2

Tangy Dill Walnut Beet Salad

Ingredients

  • 3 large beets, peeled and cut into bite sized cubes
  • 3 stalks of celery, diced
  • 1 cup ( ½ a bunch) of chopped fresh dill
  • 2 tbsp of diced red onion
  • 2 tbsp of dijon mustard
  • 1 ½ -2 tbsp mayonnaise
  • 2 lemons, juiced
  • 2 tbsp tamari
  • 1 tsp toasted sesame oil
  • 1 tbsp olive oil
  • 3 tbsp walnuts, crushed (optional)
  • salt and pepper to taste

Directions

Place the peeled cubes of beets in a large pot of water and bring to a boil. Continue boiling for 25-30 minutes. To check if they’re fully cooked, poke a large piece with a fork. Like a potato, it should be soft when done. Do not overcook, or you’ll have beet mash.

Drain and rinse the beets in a colander and place in a large bowl when fully drained.

Add all other ingredients and mix well.

Variation

Replace mayonnaise with goat’s cheese for a saltier, less emulsified creaminess.

Molecular Gastronomy: Bacon Wrapped Acorn Squash with Balsamic Caviar and Maple Sphere

Bacon wrapped acorn squash with balsamic caviar and maple sphere

I’m slightly concerned about my post titles being a bit too long. I can admit that they’re all a mouth full… and somehow, they manage to keep growing. To me, this isn’t exactly a problem as I think naming a dish according to the ingredients it contains gives my readers a clear idea of what the post (and recipe) is about.  I like to list the ingredients I feel are important to each dish, but since my recipe interests include things like flavour pairing and molecular gastronomy, I tend to think ALL of the ingredients are important. Woops. Predicament.

It’s also due to my own personal inability (or laziness) to come up with a catchy title. It’s clearly too challenging for me to plan a dish, make it, photograph it, write about it AND create a catchy title. That’s just taking it too far. Anyway, I personally like to see literal titles. Let the food speak for itself. Most people can look at the ingredients (if they’re relatively familiar with them) in a recipe and get a sense of whether or not they’ll like it. Right? The names and imagined flavours swirl around in your mind, forcing the idea of the dish into your mouth. I appreciate the honesty of a literal title… but again, there’s the whole length issue. What do you think? Let me know what sort of title catches your eye.

Bacon wrapped acorn squash with balsamic caviar and maple sphere

OK, so it turns out that this recipe is ridiculous. Utterly ridiculous in the best way. Nathan and Alex came to visit me some time ago. Just as passionate lovers never leave the bedroom, my foodie friends and I never left the kitchen over the three days they were around. Fevered moments of flavour creativity (some might say delirium) and collaboration were plentiful and virtuous food was abundant.  The guys brought with them a gorgeous array of fresh farmer’s market produce. Most important of this haul was bacon. Locally butchered, farm fresh strips of fatty delight. It created a revolution in my home and became part of almost every meal.

Bacon wrapped acorn squash with balsamic caviar and maple sphere

While we played around with my molecular gastronomy kits, futzing with spheres and such, Nathan remembered once again that we had bacon. How he could’ve forgotten, I’m not sure. I certainly hadn’t stopped thinking about it. Luckily, he took that thought one step further and remembered the acorn squash he’d brought. It came to everyone’s attention that wrapping bacon around grilled acorn squash would be painfully good. I’m still in pain now. Oy vay.

First, we blanched our cut slices of squash in boiling water for 3 minutes (only 4 at a time so the water doesn’t cool).

blanched acorn squash

Next, we grilled those beauties on a stove-top grill (pan frying is totally acceptable). Luckily, there was some bacon fat left on the grill which added extra flavour to the squash.

Grilled acorn squash

Now that our squash had those beautiful grill marks, we wrapped them (so hard) in bacon and baked them. Sadly, I must note that we had run out of bacon by that point, so not every piece of squash was wrapped.

I showed the boys how to make molecular balsamic caviar, which happily features in this dish.

Balsamic caviar

Maple spheres are also featured. And just look at that little guy! Beautiful, isn’t it?

maple sphere

Of all the maple spheres we made (about 8) this one was the only sphere presentable enough for a photo. When making spheres, it is important that your ingredients have a certain level of calcium in them for the thin film to form properly. Apparently, maple syrup is lacking in the calcium department and the film did not form well. They kept sticking and breaking when I tried to move them. In the hopes of getting one or two out of it, I left some in the sodium alginate bath for a long time (about 15 minutes), which paid off. If I were to try making them again, I’d add some yogurt to the mixture to avoid the same problem.

Bacon wrapped acorn squash with balsamic caviar and maple sphere


Bacon Wrapped Acorn Squash with Balsamic Caviar and Maple Sphere

Ingredients

1 acorn squash- cleaned of seeds (with or without peel) and divided into 8-10 pieces

Strip bacon- lots

Balsamic caviar (video instructions below)

Maple sphere (video instructions below)

Water


Directions

Preheat your oven to 350 °F/ 180 °C/ Gas mark 4.

Boil a large pot of water. Place 3-4 pieces of squash in the water. Blanch them for 3 minutes then remove them from heat. Repeat until all pieces are blanched.

Grill or pan fry the squash on high heat until the surfaces are beautifully brown.

Place bacon wrapped squash in a casserole pan and bake for 25-30 minutes.

Garnish with balsamic caviar and maple sphere.

Eat and be amazed.

Thanks guys! It was fun!