Candied Ginger Week: Candied Ginger Cocoa Nib Cookies with Nuts

candied ginger cocoa nibs coconut cookies 1.jpg

Cocoa nibs can be found in more and more places: chocolate covered cocoa nibs, smoothies, protein shakes and various baked goods. They are broken pieces of cocoa beans that have been prepped all but to the point of being processed into cocoa for chocolate.

cocoa nibs.jpg

They are rich in vitamins and nutrients and are considered a raw superfood. Cocoa nibs are pleasantly nutty, delicately earthy and they have a wonderful, crunchy texture.

Ginger syrup prep 2.jpg

They also perfectly compliment ginger. Especially candied ginger. In cookies. THESE cookies.

candied ginger cocoa nibs coconut cookies 3.jpg

Ginger and cocoa strike again.


Candied Ginger Cocoa Nib Cookies with Nuts

 candied ginger cocoa nibs coconut cookie ingredients.jpg

Ingredients

  • 2 1/8 cups all-purpose flour
  • 1 teaspoon baking soda
  • 1/2 teaspoon kosher salt
  • 1 cup walnuts, finely chopped
  • ½ cup candied ginger pieces (recipe here)
  • ¼ cup cocoa nibs
  • ½ cup shredded coconut
  • 1 cup (2 sticks) unsalted butter, room temperature
  • 1 1/2 cup light or dark brown sugar, tightly packed
  • 2 eggs
  • 2 teaspoons vanilla extract


Directions


Preheat oven to 375ºF/190ºC/Gas mark 5.

Sift flour, baking soda, and salt. Set aside

Combine candied ginger, cocoa nibs, coconut and chopped nuts. Set aside.

Cream butter and sugar in a bowl with mixer or whisk. Add eggs and vanilla and continue to whisk until the eggs are well mixed.

Slowly combine flour mixture a bit at a time. Add some and mix well. Then add a bit more. Repeat until the flour is fully incorporated and there is no trace of dry powder.

Now stir in the candied ginger mixture.

Cover a baking sheet with parchment paper and place a tablespoon-sized dollop of dough evenly spaced along the pan. Leave about two inches between the dollops so they have enough room to expand without being crowded.

candied ginger cocoa nibs coconut cookie batter.jpg

Bake for 8-10 minutes. Keep an eye on them as they bake quite fast. They are done when the edges are brown and the middle is still a little raw looking.

Remove from heat and let cool. Devour immediately or freeze. Share with friends. Bring to a potluck. Or a brunch. Replace cookie for spoon with you ice cream. Dip in milk. Or milkshake. Anyway you do it, enjoy.

Makes about 24 cookies


Candied Ginger Week: Cocoa covered candied ginger


candied ginger, ginger syrup and cocoa covered candied ginger.jpg


When one finds oneself with an excess of candied ginger (I seem to have mountains) one must find ways of using the spicy nuggets creatively. Here are a few simple steps to help support this endeavor:


Step 1: Place some cocoa powder in a container.

Step 2: Add about the same amount of your leftover candied ginger to said container.

Step 3: Place a lid on said container.

Step 4: Shake contents until evenly coated.

Step 5: Sprinkle on ice cream, use to decorate your next cake, mix with hot water and make some sort of weird (but probably delicious) tea, add to trail mix or just eat as a snack.


ginger syrup prep 4.jpg


Bite: Sorbet

Sorbet can be traced back as far as 3000 B.C.E. Somewhere in Asia, some crazy geniuses were mixing crushed fruit with ice. A bit later in Egypt, pharaohs offered their guests fruit juices mixed with ice to beat the heat. Later still, fine cuisine loving Italians used sorbet as a palate cleanser in between courses. Eventually, it morphed into the gorgeous, healthier-cousin-of-ice-cream it is today. I would like to thank everyone involved. You personally helped get this spoonful of grapefruit sorbet into my mouth.


the hand that feeds.jpg

Experimenting with Dumplings + Musings On Time

 vegetarian dumplings 1.jpg

I’ve come to a place in my life where I realize how precious time is. I wish I had more of it. I wish I hadn’t wasted so much time in my youth on… being young. Wandering aimlessly. Thinking about various paths to take with my life and not committing to anything in particular besides living. It is, at times, difficult to avoid overwhelming myself with big questions and demands. “Why didn’t you just go for it?” my brave self says. “Why did you go for it?” my careful self says.  Honestly, how do we not tear ourselves to shreds everyday? Damn you, self-reflection.

 handmade mushroom dumplings detail

Though, I know time is never really wasted. Not really. One of the self-preservation guidelines I have acquired over my 34 years is to live life without regret. No regret for my actions or inactions. Think carefully, but not too carefully. Pick your battles, but don’t let yourself be pushed around. Cut your losses when you need to, but stand firm at other times. Focus your energy on what makes you feel good and productive. As a youth, people generally terrified me. The amount of times I wish I’d said/did something but didn’t is uncountable and I lived with the regret of it. I lived with it… until I didn’t. There was a moment in my life where I understood that regret is the most wasteful emotion in existence. Ain’t nobody got time for that.


I’m a little embarrassed to admit this, but it was actually after watching Brokeback Mountain that I decided to kick regret out of my life. I literally cried for two weeks- everyday, all day -after watching that film. It is a story of a character’s lifelong regret and it gave a very brutal, very lonely idea of what it took from him. It destroyed me. I felt like I was mourning the loss of time. All the time that I had dwelled on things that didn’t help me or hadn’t made the best of a situation. Why had I let my insecurities ever get the best of me? Why have I let my fears take control? I have a body and a mind. Use them! Go! Do! Be! I cried and cried and when I finished crying, I was done and have been ever since. Luckily, regret is just a state of mind. I still do dumb things, but just don’t regret them. Instead, I learn from them and take notes on how do it better next time. I suppose time has had a hand in that.

mostly vegetarian mushroom dumplings filling

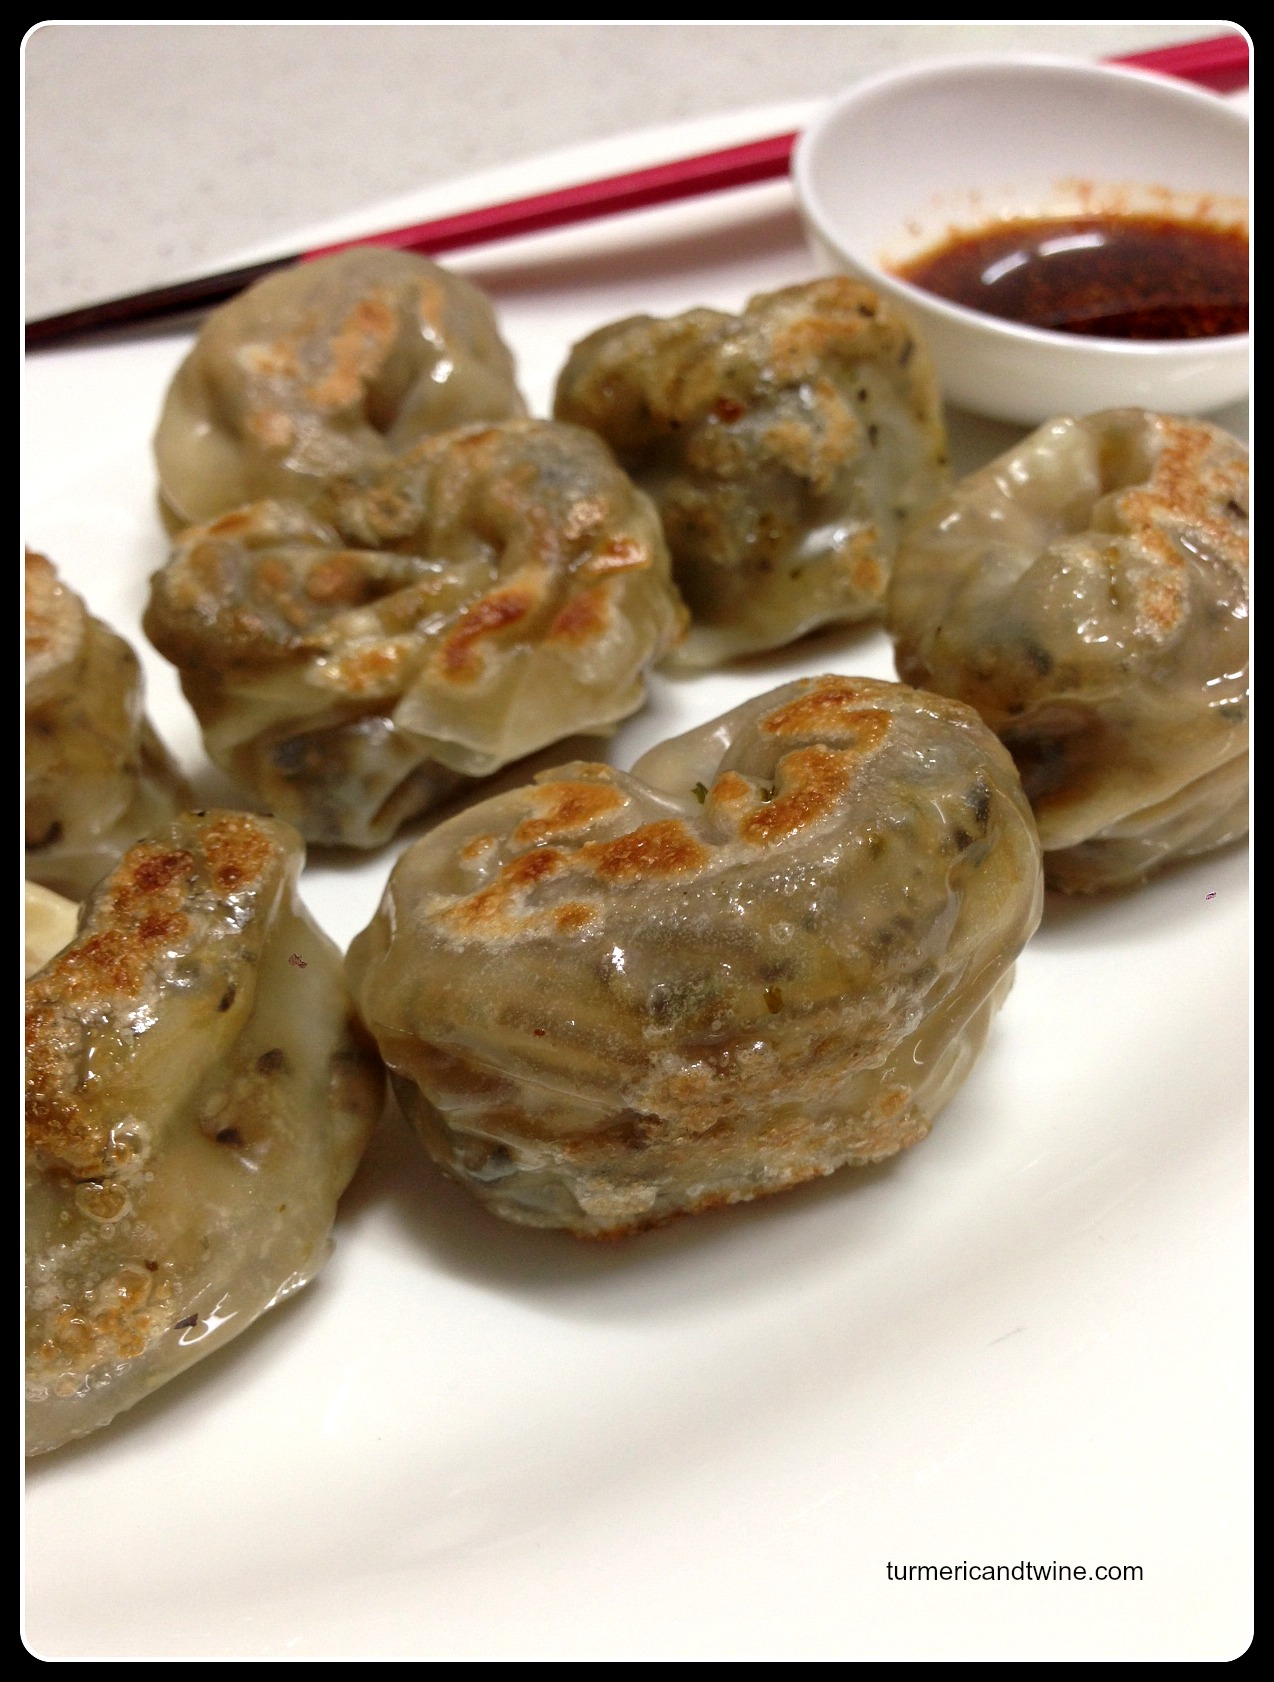
I greatly enjoy wrapped things as well as the act of wrapping things. Wrapped things contain presents, surprises to discover. I take any opportunity to wrap things, especially food. Mandu, or dumplings, are so fun. I bought some mandu wraps recently and gave my first attempt at making those mini pockets of delight. I often see Mandu Masters working their magic on each specimen, making them perfectly uniform every time and with incredible speed and efficiency. I bow down to these masters.

Some discoveries from my first few attempts:

  • It is challenging to prevent the mandu from looking like deformed ears.
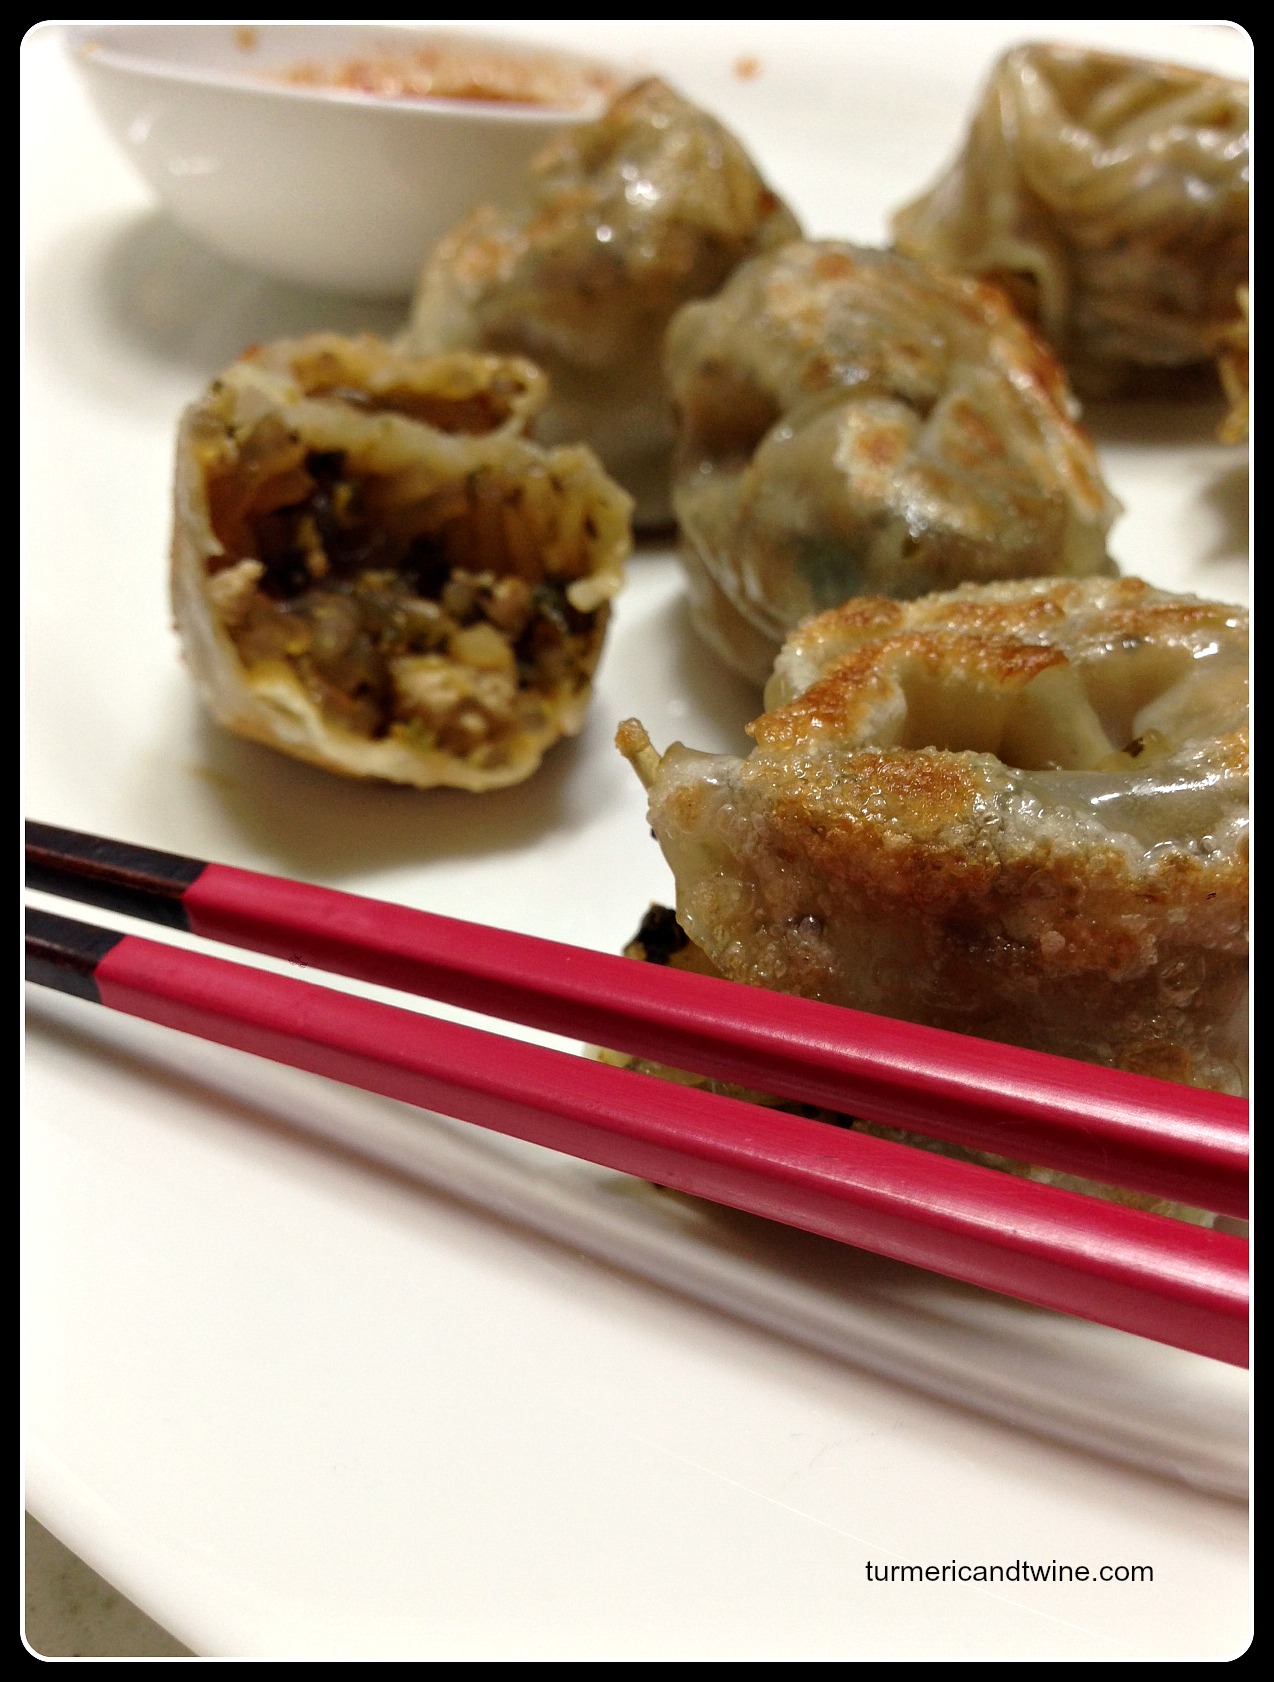
  • It is fun to eat the ones you mess up.
  • You can fill your mandu with pretty much whatever you want, as long as it is viscous enough.


Mandu wraps can be found in the refrigerator section of just about any market or supermarket in Korea. If you do not reside in Korea/Asia nor have a market that provides these wraps, they can be made easily with a little flour and water. I may try a more traditional filling recipe someday, but for now, experimenting is too much fun.

Here is the recipe I made most recently.

vegetarian dumplings.jpg

Vegetarian Mandu and Dipping Sauce


Ingredients

  • 1 package of mandu wraps (containing 20-30 wraps)
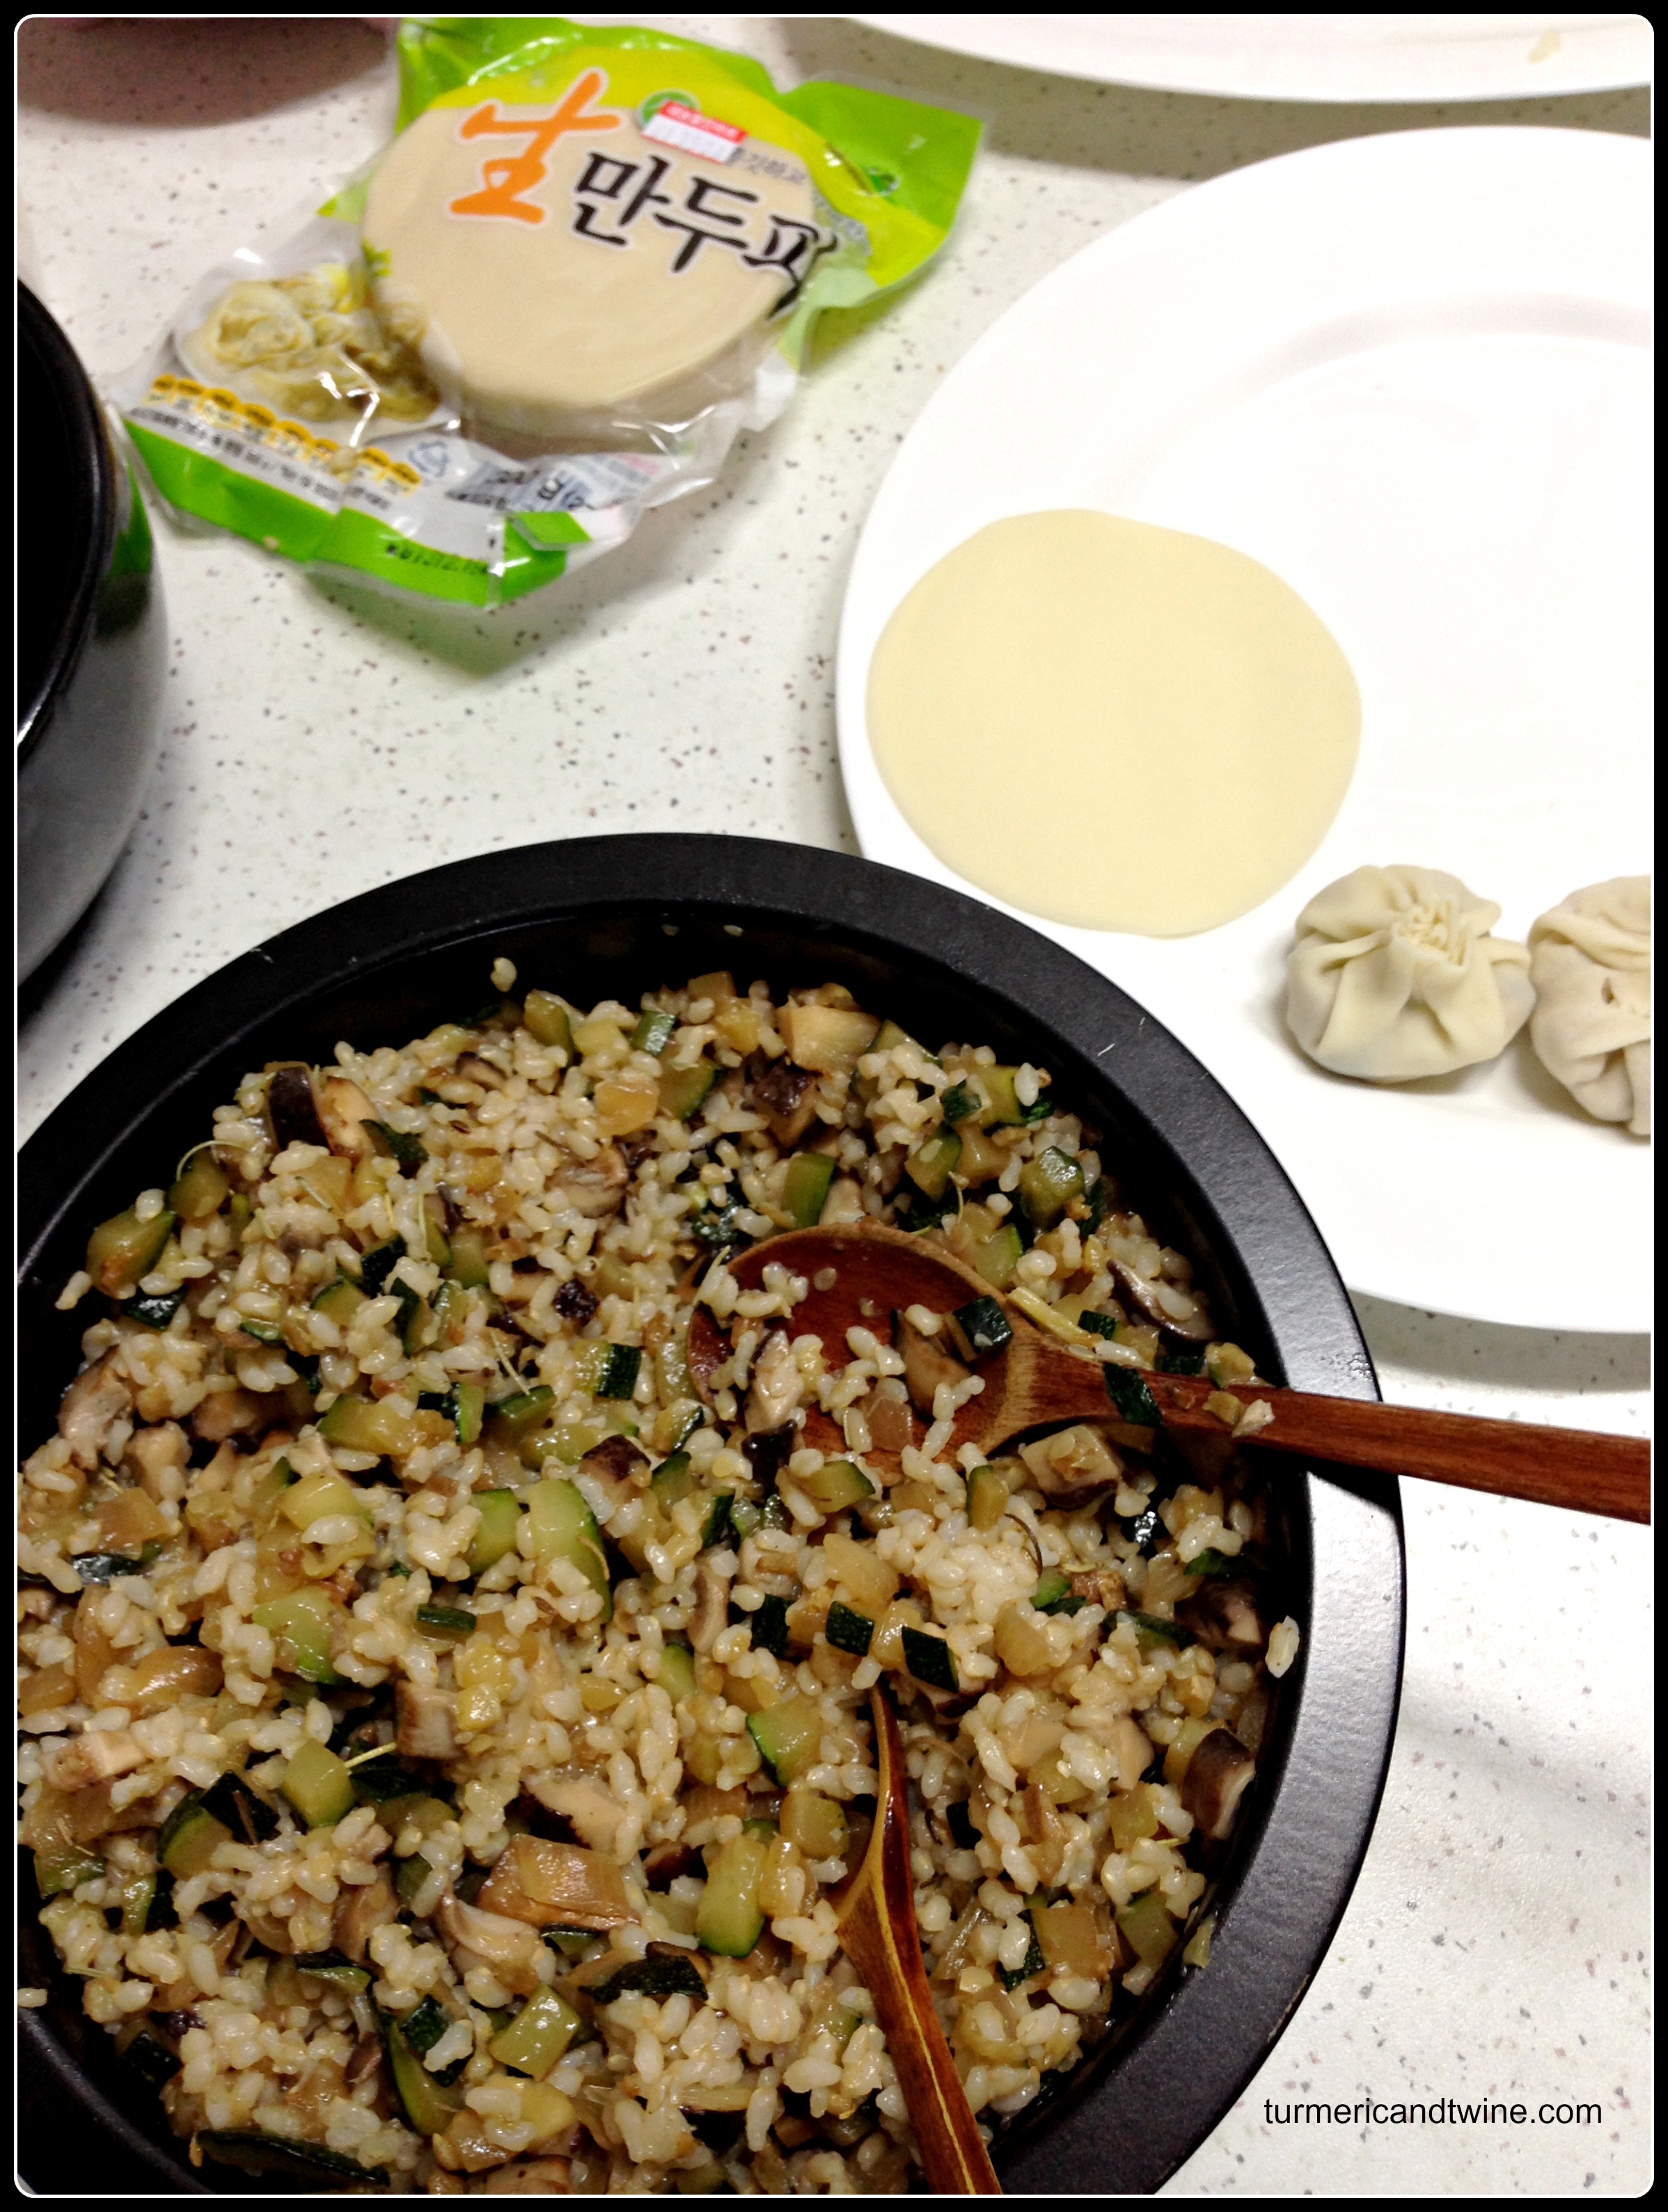
  • 2 cups of cooked rice, rice noodles or your starch of choice
  • 1 block of firm tofu
  • celery tops and leaves from one bunch, chopped
  • 8-10 cloves of garlic, chopped
  • 3 chili peppers, chopped
  • 1 onion, chopped
  • ½ teaspoon salt

Directions

Heat a stovetop fry pan and pour in a dash of cooking oil over medium high heat. Cook the chopped garlic, chilies and onions for a few minutes until translucent and slightly brown. Then, add the chopped celery. Cook until the celery is tender. Once cooled, blend this mixture until viscous. Set aside in a bowl.

If using rice noodles or any longer noodles, be sure to break or cut them before adding to the filling mixture. This is to prevent difficulty in closing up the mandu properly. If using rice, simply add to the mixture.

Heat your stovetop pan once again with oil on medium high heat. Crumble the tofu by hand directly into the pan and cook for 5-10 minutes or until slightly brown. Add the tofu to the rest of the filling mixture along with the salt. Mix.

Prepare a steamer with water and heat until boiling.

Now for the fun part: filling the wraps. Place a heaping teaspoon of filling into the center of each wrap. Fold one side over and roll the wrap into a log shape. Pinch the ends closed and wrap them around until they touch on one side. Wet your fingers and pinch together until closed. Place them in the steamer and steam for 7-10 minutes.

Your mandu can be eaten at this stage, but I highly recommend a further step of a light pan-frying. This makes your mandu extra delicious. Simply, heat a little oil in a pan and fry the mandu on each side for about 2-3 minutes.

For the sauce, my method is fool proof and delicious: one part soy sauce, one part white or apple cider vinegar and a pinch of chili powder.

Dip your lopsided, ear-shaped mandu lovingly into the sauce. Laugh about how each one will help you hear better and devour ruthlessly.

Korean Fist-Rice with Fried Seaweed, Prosciutto and White Truffle Oil

Korean Fist Rice with Fried Seaweed Prosciutto and White Truffle Oil 2

Of all the comfort foods I have grown to love here in Korea, Joomeok Bap, or Fist-Rice has become one of my favourites. This snack is healthy, tasty, easy and satisfying to make. It is perfect to bring on a picnic or as a pick-me-up when outdoors.

Korean Fist Rice with Fried Seaweed Prosciutto and White Truffle Oil

Fist-Rice is traditionally made by hand-mixing various vegetables, as well as ground beef or dried anchovies with rice. The mixture is then tightly packed into individual, fist shaped balls.  The best of the bunch uses crumbled seaweed (kim ga-ru). This is because Korean seaweed is deep-fried, salted and flavoured with sesame seeds, perilla oil and a pinch of sugar. The stuff is salty, greasy and delicious, so it’s easy to devour an entire bag in one go.

Korean Fist Rice with Fried Seaweed Prosciutto and White Truffle Oil 1

The combination of flavours in this dish are so glorious, it brings tears to my eyes. Land and sea take hand and make beautiful fist shaped babies.

Korean Fist Rice with Fried Seaweed Prosciutto and White Truffle Oil 3

Korean Fist-Rice with Fried Seaweed, Prosciutto and White Truffle Oil

Ingredients

  • 2 cups of uncooked sticky or glutinous rice
  • 4 cups water
  • 70 grams (about 1 ½ cups) Korean crumbled seaweed
  • 100 grams thinly sliced prosciutto torn into small pieces
  • White truffle oil

Directions

Rinse rice two or three times and drain. Pour the measured water on the rice in a pot and cover. Bring to a rolling boil on high heat for 10 to 15 minutes.

Lower heat to the minimum temperature and allow the rice to cook for another 30 minutes. Never stir the rice. To check if it has absorbed all the water, simply tip the pot on it’s side. If the rice slides, it needs to continue cooking. If it doesn’t slide, it is ready to be removed from heat.

Allow the rice to cool enough that it doesn’t burn to touch with your hand.

Combine the seaweed and prosciutto with the rice. Grab small handfuls of the mixture and squeeze to form tightly packed spheres.

Drizzle white truffle oil over the fist rice and devour.

No Korean products available near you? Order here. Or here.

DIY Halloween: Spiced Rum Sea Salt Tootsie Rolls and Oriole Costume

Like most North Americans, I love Halloween. The history, the nostalgia and the excitement all jump-start us into Do-It-Yourself action to where we can’t help ourselves but to dress-up and party. It’s a very special annual event and I try to pay my respects by putting effort into costumes, candies and parties.

Having spent my previous three Halloweens in the massive metropolis of Seoul, this year’s quaint Berkshire retreat center Halloween just didn’t get my heart pounding. Though Korea doesn’t traditionally celebrate Halloween, the large ex-pat community (composed mostly of English teachers) and a general love of partying have made certain areas of Seoul a fountain of pure Halloween joy. A few Seoul neighborhoods, such as Itaewon and Hongdae, have become foreigner hot spots, so there is an endless stream of bars, people watching, parties and costume contests.

My Halloween this year was very, uh, … quiet. Many of the people I was surrounded by didn’t dress up or acknowledge that a special occasion was occurring. I, on the other hand, was possessed by the idea of a homemade DIY Halloween and fully allowed the spirit to blow through me like a hurricane (speaking of Sandy, we were extremely lucky in the NY Berkshires. We had very few power outages and little damage. A few weak trees were loosened and are threatening to fall, but haven’t yet. Hopefully, they will be removed soon. Other than that, it was just a very windy storm).  

My costume this year was of an Oriole. I was inspired to make this for two main reasons:

1) I’ve had a ridiculous bright red-orange gown for years and have always wanted to alter it into something I’d actually wear.

2) I found this fun, easy and fabulous DIY wing tutorial that made me want to be a bird of some kind. A quick Google search of what birds fit my colour criteria told me that an oriole made perfect sense. Voila!


And, for obvious reasons of delciousness and awesomeness, I had to make some spiced rum tootsie rolls, too. They’re very easy and extremely satisfying.

Homemade Spiced Rum Sea Salt Tootsie Rolls

Ingredients

  • ½ cup cocoa powder
  • ¼ cup honey
  • ½ cup molasses
  • 1 cup icing or confectioners sugar
  • 2 cups nonfat milk powder
  • 3 tbsp melted butter
  • 2 tsp vanilla extract
  • 4 tbsp spiced rum
  • A pinch of sea salt (coarse is preferable)

tootsie ingredients

Directions

In a bowl, mix the cocoa, honey, molasses and vanilla together. Once smooth, add the butter, powdered sugar, salt and rum.

tootsie mix

Using a spatula or wooden spoon, mix the milk powder into the mixture. Knead the tootsie mix with your hands, if you prefer. It should form a smooth looking lump when finished.

tootsie lump

Let it rest and further merge into tootsie-ness for 20 minutes.

tootsie lump cut

Using a knife or pizza-cutter cut the giant tootsie into strips. Then into one inch chunks. The chunks should be malleable and not sticky.

tootsie chunk

Cut some wax paper into pieces large enough to wrap your tootsie chunks in.  Wrap them.

tootsie wraps

Bring them to a party and watch your friends devour them.

tootsie rolls

Makes 40-45 pieces.

tootsie costume tray